
1. Въведение
The ASUS Z170-DELUXE is a high-performance desktop motherboard designed for Intel Z170 chipset and LGA 1151 socket processors. It offers advanced features for enhanced speed, stability, and connectivity, making it suitable for demanding computing tasks and gaming. This manual provides essential information for setting up, operating, and maintaining your motherboard.
Основните характеристики включват:
- 5-посочна оптимизация: Dynamic system tuning for performance, efficiency, digital power, fan control, and networking.
- ASUS PRO Clock Technology: Dedicated base-clock generator for extended overclocking margins.
- Кристален звук 3: Advanced audio solution for clear and immersive sound.
- 3x3 Dual-Band 802.11ac Wi-Fi + BT4.0: Integrated high-speed wireless connectivity.
- NVME U.2 Device Support and Hyper M.2 x4 Mini Card Support: Next-generation storage options for ultra-fast data transfer.
- USB 3.1 Type-A and Type-C Ports: High-speed USB connectivity with reversible Type-C.
- 5X защита II: Hardware-level safeguards for long-term durability and reliability.
- Intel Ethernet: Optimized network performance with reduced CPU overhead.
2. Настройка и инсталация
This section guides you through the physical installation of the ASUS Z170-DELUXE motherboard and its components.
2.1. Подготовка на вашата система
- Уверете се, че захранването е изключено от контакта.
- Prepare your computer case and ensure adequate space for installation.
- Gather necessary tools, including a Phillips head screwdriver.
2.2. Инсталиране на дънната платка
- Carefully place the motherboard into your computer case, aligning it with the standoffs.
- Закрепете дънната платка с винтове.
- Install the CPU (Intel LGA 1151) into the socket, ensuring correct orientation.
- Нанесете термопаста и инсталирайте охладителя на процесора.
- Install DDR4 RAM modules into the designated slots (4 available). For optimal performance, refer to your CPU and RAM manufacturer's guidelines for dual-channel configuration.
- Connect the 24-Pin main power connector and the 8-Pin CPU power connector from your power supply to the motherboard.
- Connect front panel headers (power button, reset button, USB ports, audio jacks) using the provided Q-Connector for easier installation.

Figure 1: ASUS Z170-DELUXE Motherboard layout.
2.3. Storage and Expansion Card Installation
- SATA устройства: Connect SATA storage drives (HDDs/SSDs) to the available SATA 3 ports (6 total).
- M.2/U.2 Devices: For NVMe M.2 SSDs, insert the module into the M.2 slot and secure it. The motherboard supports NVMe U.2 devices via an adapter (sold separately).
- PCIe карти: Install graphics cards or other expansion cards into the appropriate PCIe slots (7 total).
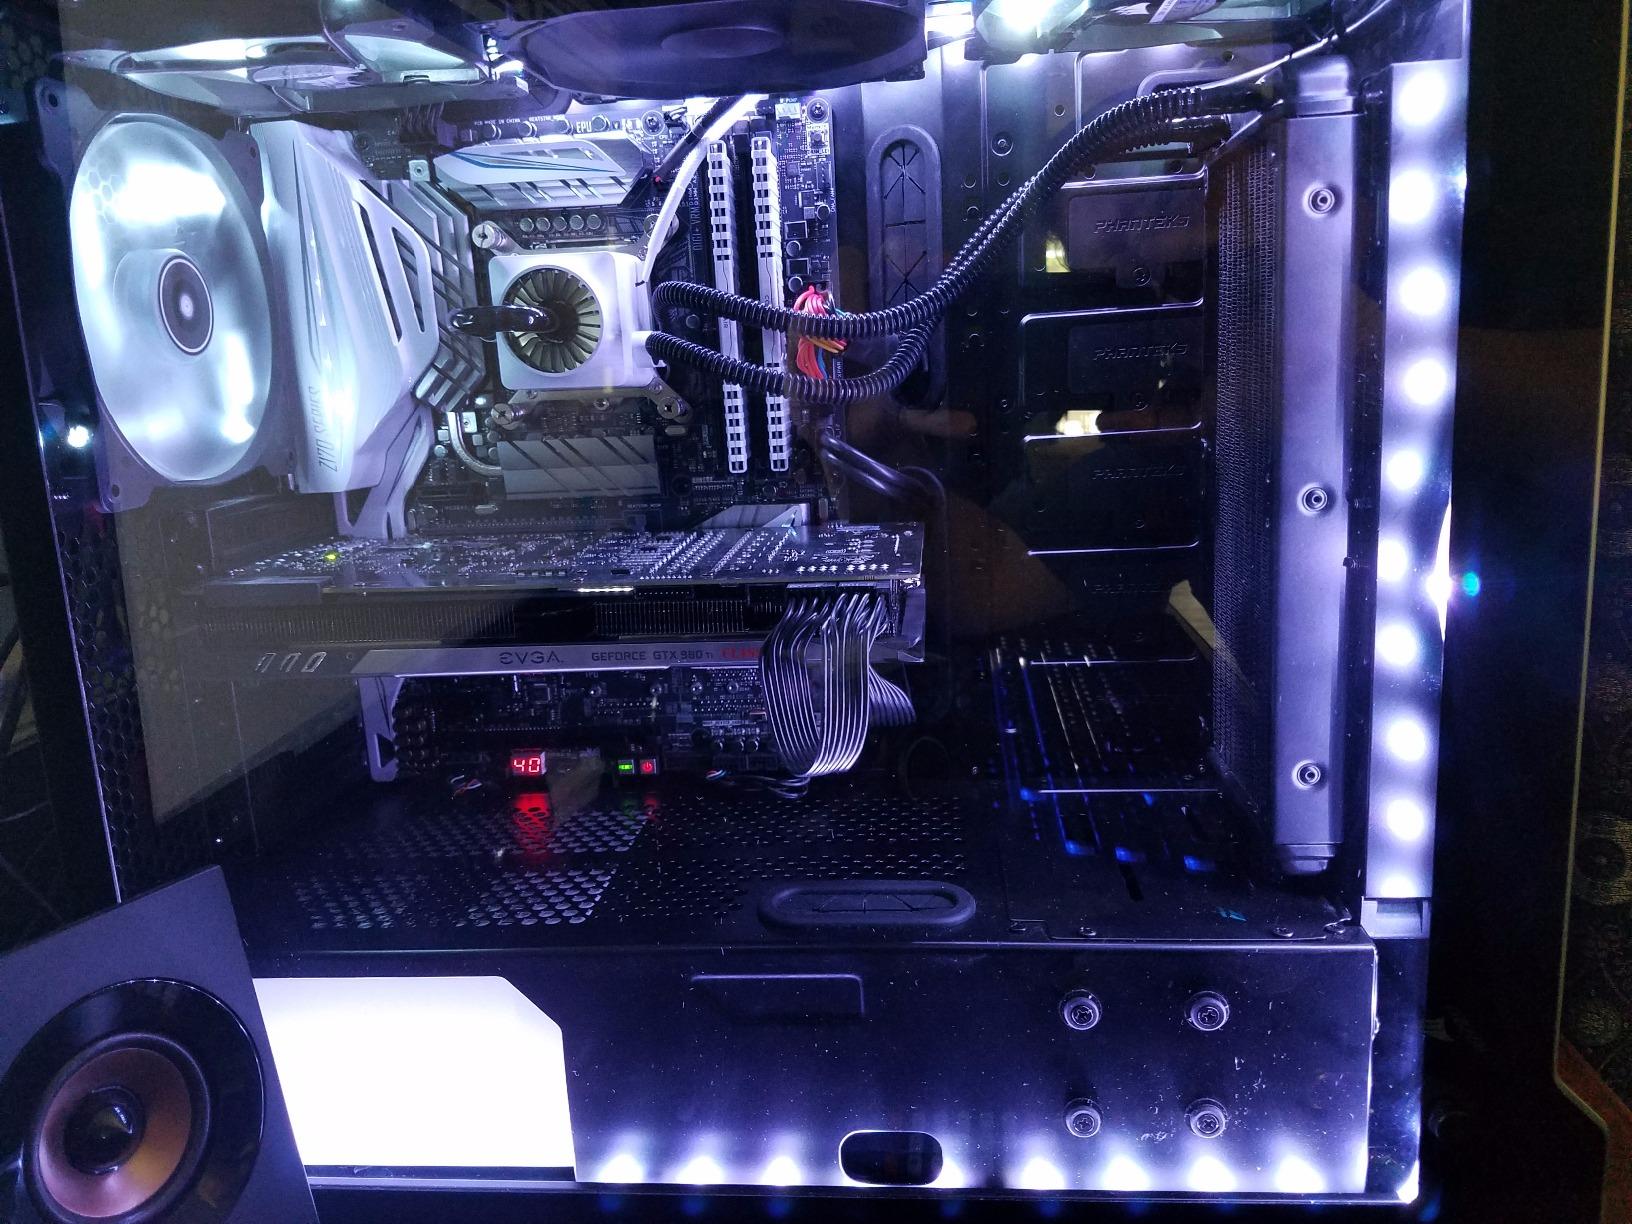
Figure 2: ASUS Z170-DELUXE Motherboard installed in a system, showcasing component layout.
3. Инструкции за работа
This section covers the basic operation and key features of your ASUS Z170-DELUXE motherboard.
3.1. Първоначално зареждане и настройка на BIOS
- After connecting all components and peripherals, power on your system.
- Натиснете DEL or F2 key during startup to enter the UEFI BIOS.
- In the BIOS, you can configure boot order, enable XMP for RAM, adjust fan speeds, and manage other system settings.
- The ASUS UEFI BIOS provides an intuitive interface for easy navigation and configuration.
3.2. Инсталиране на софтуер и драйвери
- Install your operating system (e.g., Windows 10).
- Install the latest drivers for the Z170 chipset, audio, LAN, Wi-Fi, and other integrated components from the ASUS support webсайта или предоставения диск с драйвери.
- Utilize ASUS utilities like AI Suite 3, което включва FAN Expert for advanced fan control and 5-Way Optimization for system tuning.
3.3. Характеристики за свързване
- USB 3.1: Utilize the high-speed USB 3.1 Type-A and reversible Type-C ports for fast data transfer with compatible devices.
- Wi-Fi и Bluetooth: Connect to wireless networks using the integrated 3x3 Dual-Band 802.11ac Wi-Fi. Bluetooth 4.0 allows connection to wireless peripherals.
- Intel Ethernet: Benefit from stable and high-throughput wired network connections.
4. Поддръжка
Правилната поддръжка гарантира дълготрайността и оптималната производителност на вашата дънна платка.
- Пази чистота: Regularly clean dust from the motherboard and case interior using compressed air. Ensure fans are free of obstructions.
- Актуализации на BIOS: Периодично проверявайте поддръжката на ASUS website for BIOS updates. Updating the BIOS can improve compatibility, stability, and performance. Use the ASUS EZ Flash utility for safe BIOS updates.
- Актуализации на драйвери: Keep all drivers (chipset, audio, LAN, etc.) updated to their latest versions for optimal performance and security.
- Захранване: Ensure your power supply provides stable and sufficient power to all components. Unstable power can lead to system instability.
5. Отстраняване на проблеми
This section addresses common issues you might encounter with your ASUS Z170-DELUXE motherboard.
- No POST (Power-On Self-Test) / Error Code 55:
- Error code 55 typically indicates a memory issue.
- Уверете се, че RAM модулите са напълно поставени в слотовете си.
- Try booting with only one RAM stick, testing each slot and module individually to identify a faulty stick or slot.
- Verify RAM compatibility with the motherboard's QVL (Qualified Vendor List) on the ASUS webсайт.
- Update the BIOS to the latest version, as this often includes memory compatibility improvements.
- Няма видео изход:
- Ensure your monitor is connected to the correct video output (integrated graphics or dedicated graphics card).
- If using integrated graphics with a 4K display at 60Hz via HDMI, you might experience a blank screen. The integrated HDMI port on the Z170 chipset may be limited to 30Hz at 4K resolution. Consider using a DisplayPort connection or a dedicated graphics card for 4K 60Hz output.
- Reseat your graphics card if applicable.
- Проверете избора на вход за монитор.
- Нестабилност на системата / Сривове:
- Ensure all power connectors are securely attached.
- Проверете температурите на процесора и графичния процесор. Прегряването може да причини нестабилност.
- Verify RAM stability using memory diagnostic tools.
- If using RAID, ensure Intel Rapid Storage Technology (IRST) drivers are compatible. Some IRST driver versions (e.g., 14.8.1.1042 or 15.2.0.1020) have been reported to cause issues with certain configurations. Try using an older stable version (e.g., 14.0.0.1143 or 14.5.0.1081) or uninstall IRST if not using RAID.
- Ensure your power supply is sufficient for your components.
- Периферното устройство не е открито:
- Проверете физическите връзки.
- Инсталирайте или актуализирайте съответните драйвери.
- Test the peripheral on another port or system.
6. Спецификации
| Характеристика | детайл |
|---|---|
| Марка | ASUS |
| Име на модела | Z170-DELUXE |
| CPU Socket | LGA 1151 |
| Тип чипсет | Intel Z170 |
| Съвместими процесори | Intel Celeron, Core i7 (and other LGA 1151 compatible CPUs) |
| Технология RAM памет | DDR4 |
| Честота на паметта | 2133 MHz (базова, поддържа по-високи чрез XMP) |
| Налични слотове за памет | 4 |
| Максимален размер на RAM паметта | 64 GB |
| Total SATA Ports | 6 |
| Общо USB портове | 15 (including USB 3.1 Type-A and Type-C) |
| Брой Ethernet портове | 2 (Intel Ethernet) |
| Total Number of HDMI Ports | 1 |
| Total PCIe Ports | 7 |
| Интерфейс на графична карта | Integrated, PCI Express |
| Тегло на артикула | 0.8 килограма |
7. Гаранция и поддръжка
За подробна информация за гаранцията, моля, вижте гаранционната карта, включена в продукта, или посетете официалния сайт за поддръжка на ASUS. website. ASUS provides technical support and resources to assist with any product-related inquiries.
- Поддръжка на ASUS Webсайт: www.asus.com/support/
- Информация за контакт: Обърнете се към ASUS website for regional contact details and customer service options.
Note: Warranty terms and conditions may vary by region. Please retain your proof of purchase for warranty claims.