Въведение
Thank you for choosing the Domo DO7280S Vacuum Cleaner. This manual provides essential information for the safe and efficient use, maintenance, and troubleshooting of your appliance. Please read it thoroughly before first use and keep it for future reference.
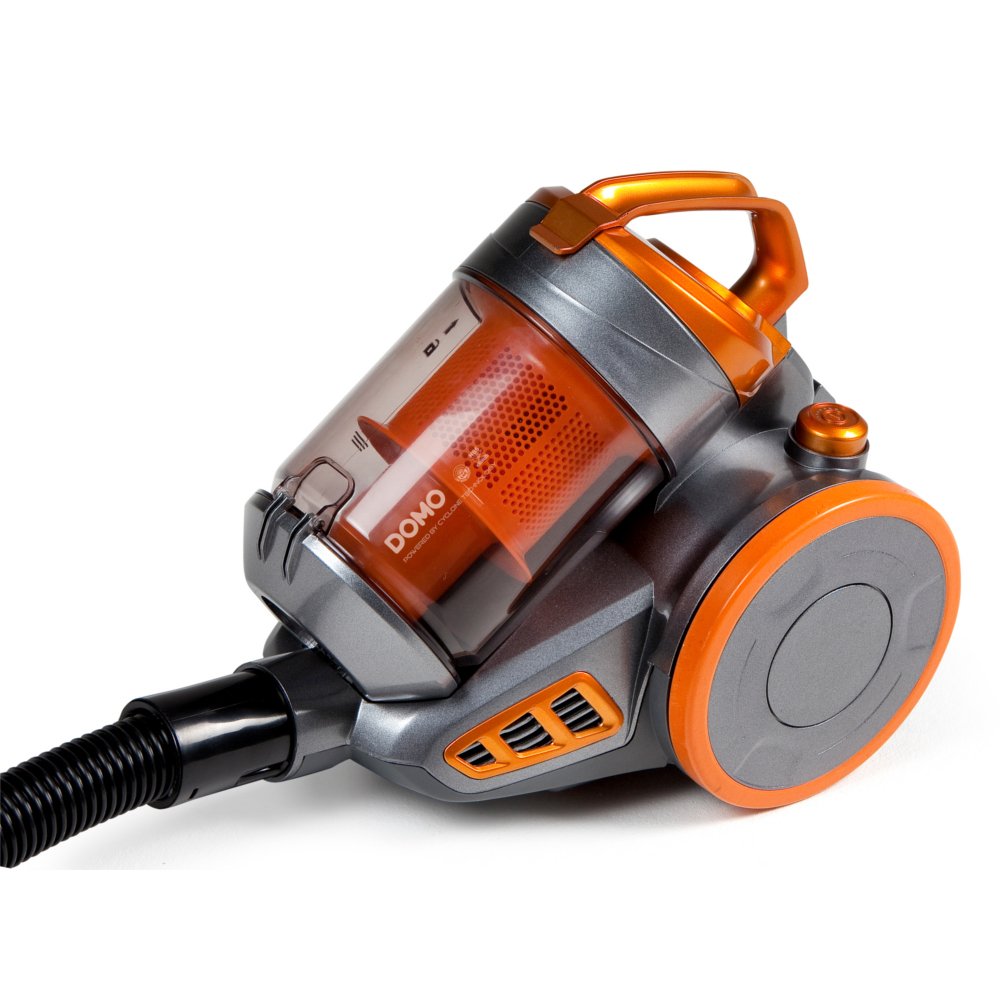
Image: The Domo DO7280S vacuum cleaner, fully assembled with its hose, telescopic tube, and floor brush, ready for use. The main unit is grey and orange.
Инструкции за безопасност
Винаги спазвайте основните предпазни мерки при употреба на електрически уреди, за да намалите риска от пожар, токов удар и телесни наранявания.
- Уверете се, че захранването обtage съответства на етикета с характеристики на уреда.
- Не използвайте прахосмукачката за събиране на вода или мокри вещества.
- Не почиствайте с прахосмукачка леснозапалими или горими материали, гореща пепел или остри предмети.
- Дръжте косата, широките дрехи, пръстите и всички части на тялото далеч от отвори и движещи се части.
- Изключете уреда от контакта, преди да го почиствате или извършвате поддръжка.
- Не използвайте прахосмукачката с повреден кабел или щепсел.
- Този уред е само за домашна употреба.
Продуктът е свършилview
The Domo DO7280S is a cylinder vacuum cleaner designed for efficient cleaning across various surfaces. It features a multi-filter system and electronic suction control.
Главни компоненти:
- Main Unit (Motor, Dust Container, Filters)
- Гъвкав маркуч
- Телескопична метална тръба
- Eco-brush Floor Nozzle
- Crevice Tool with Brush (Accessory)

Изображение: Отстрани view of the Domo DO7280S vacuum cleaner, highlighting the main unit, large wheels, and the connection point for the hose and telescopic tube.
Настройка
- Разопаковане: Внимателно извадете всички компоненти от опаковката. Запазете опаковката за бъдещо съхранение или транспортиране.
- Закрепване на гъвкавия маркуч: Поставете края на гъвкавия маркуч в смукателния отвор на основното устройство, докато щракне здраво на мястото си.
- Assembling the Telescopic Tube: Connect the handle end of the flexible hose to the telescopic metal tube. Adjust the tube length by pressing the release button and sliding it to the desired height.
- Connecting the Floor Nozzle: Attach the Eco-brush floor nozzle to the end of the telescopic tube. Ensure it is firmly connected.
- Захранване: Extend the power cord from the main unit and plug it into a suitable electrical outlet.
Оперативен
- Включване/изключване: Натиснете бутона за захранване, разположен на основното устройство, за да включите или изключите прахосмукачката.
- Регулиране на мощността на засмукване: Use the electronic suction control dial or buttons on the main unit to adjust the suction strength according to the surface being cleaned. Lower settings are suitable for delicate fabrics, while higher settings are for carpets and hard floors.
- Using the Eco-brush: The Eco-brush is designed for efficient cleaning on various floor types. For optimal performance, move the nozzle slowly over the surface.
- Използване на аксесоари: For specific cleaning tasks, detach the Eco-brush and attach the crevice tool with brush for corners, edges, and upholstery.
- Dust Container Full Indicator: The vacuum cleaner is equipped with an indicator that signals when the dust container needs to be emptied. Observe this indicator for optimal performance.
Поддръжка
Regular maintenance ensures the longevity and optimal performance of your Domo DO7280S vacuum cleaner. Always unplug the appliance before performing any maintenance.
Изпразване на контейнера за прах:
- Натиснете бутона за освобождаване, за да отделите контейнера за прах от основното устройство.
- Дръжте контейнера за прах над кофа за отпадъци.
- Open the bottom lid of the dust container to release the collected dirt.
- Затворете плътно капака и поставете отново контейнера за прах към основното устройство.
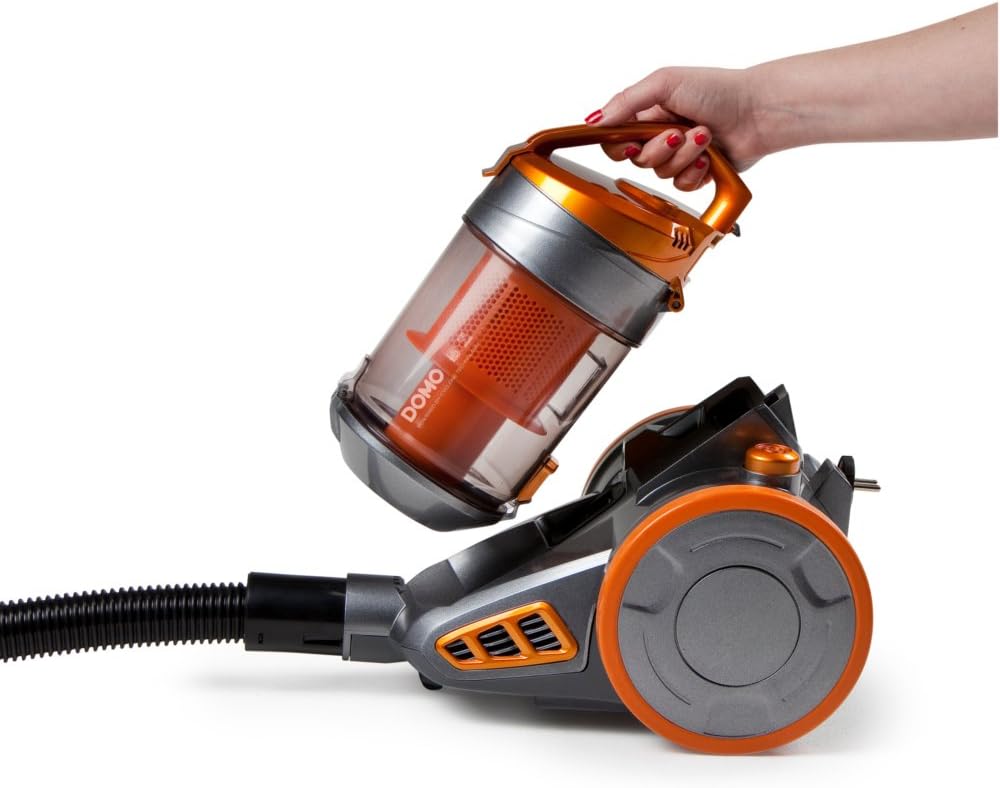
Image: A hand demonstrating the removal of the transparent orange dust container from the main body of the Domo DO7280S vacuum cleaner.

Image: A hand opening the bottom lid of the transparent orange dust container, revealing the internal filter system, ready for emptying.
Почистване на филтрите:
The Domo DO7280S features a multi-filter system. Regular cleaning of these filters is crucial for maintaining suction power.
- After emptying the dust container, remove the internal filters.
- Tap the filters gently over a bin to dislodge fine dust.
- If washable, rinse filters under cold running water. Ensure they are completely dry before reinserting.
- Do not use detergents or hot water on filters unless specified.
- Сменете филтрите, ако са повредени или прекомерно износени.
Отстраняване на неизправности
| проблем | Възможна причина | Решение |
|---|---|---|
| Без захранване | Не е включен в контакта; контактът е повреден; бутонът за захранване не е натиснат. | Проверете свързването на щепсела; тествайте контакта с друг уред; натиснете здраво бутона за захранване. |
| Ниска мощност на засмукване | Контейнерът за прах е пълен; филтрите са запушени; маркучът/тръбата/дюзата са запушени. | Empty dust container; clean or replace filters; check for and remove blockages. |
| Необичаен шум | Blockage in hose/tube/nozzle; motor issue. | Проверете за запушвания и ги отстранете. Ако шумът продължава, свържете се с отдела за обслужване на клиенти. |
| Изтичане на прах | Контейнерът за прах не е затворен правилно; филтрите не са правилно поставени или са повредени. | Уверете се, че контейнерът за прах е плътно затворен; проверете монтажа на филтъра; сменете повредените филтри. |
Спецификации
| Характеристика | детайл |
|---|---|
| Марка | Домо |
| Номер на модела | DO7280S |
| Размери на продукта | 43 х 32.99 х 27 см |
| Тегло на артикула | 5.58 кг |
| Capacity (Dust Container) | 1.5 литра |
| Уотtage | 1000 вата |
| Клас на енергийна ефективност | C |
| Годишна консумация на енергия | 38 киловатчаса годишно |
| Препоръка за повърхност | Всички етажи |
| Форма фактор | Канистър |
Гаранция и поддръжка
For warranty information, technical support, or service inquiries, please refer to the warranty card included with your product or contact Domo customer service directly. Keep your proof of purchase for warranty claims.


