1. Въведение
This manual provides detailed instructions for the Waveshare Dust Sensor Detector Module, featuring the Sharp GP2Y1010AU0F sensor. This module is designed for accurate detection of fine particles, including those found in cigarette smoke, with a diameter larger than 0.8µm. It outputs an analog voltage directly proportional to the dust density, making it an essential component for various air quality monitoring and control systems.

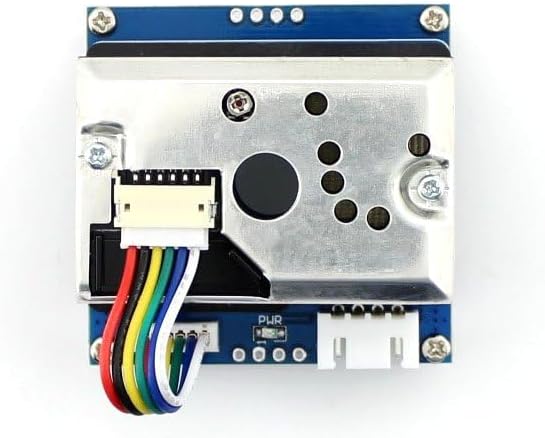
Figure 1: Waveshare Dust Sensor Detector Module.
2. Ключови характеристики
- Sharp GP2Y1010AU0F Onboard: Detects fine particles larger than 0.8µm in diameter, including cigarette smoke.
- Ниска консумация на енергия: Efficient operation for extended use.
- Аналогов томtage Изход: Provides an output level that is linear with dust density, simplifying data interpretation.
- Embedded Voltage Boost Circuit: Supports a wide range of power supply inputs (2.5V to 5.5V).
3. Технически спецификации
| Параметър | Стойност |
|---|---|
| Чувствителност | 0.5V/(100µg/m³) |
| Обхват на измерване | 500µg/m³ |
| Захранване | 2.5V ~ 5.5V |
| Работен ток | 20mA (макс.) |
| Работна температура | -10℃ ~ 65℃ |
| Температура на съхранение | -20℃ ~ 80℃ |
| Време на живот | 5 години |
| Размери (Д×Ш×В) | 63.2 мм × 41.3 мм × 21.1 мм |
| Размер на отвора за монтаж | 2.0 мм |
| Air Hole Size | 9.0 мм |
Фигура 2: Надview diagram showing key specifications and connection details.
4. Съдържание на пакета
The Waveshare Dust Sensor Detector Module package typically includes:
- 1x Waveshare Dust Sensor Detector Module (with Sharp GP2Y1010AU0F)
- 1x 6-pin connection cable

Figure 3: Included 6-pin connection cable.
5. Настройка и свързване
To integrate the Waveshare Dust Sensor Detector Module with a microcontroller unit (MCU), follow these connection guidelines:
- VCC: Connect to the power supply of your MCU. The module supports a voltage range of 2.5V to 5.5V. Ensure your power supply is within this range to prevent damage.
- GND: Connect to the ground (GND) of your MCU.
- AOUT: Connect to an analog input pin on your MCU. This pin provides the analog voltage output, which is proportional to the dust density.
- ILED: Connect to a digital I/O pin on your MCU. This pin is used to drive the internal infrared LED of the sensor. Refer to the sensor's datasheet or Waveshare's documentation for specific timing requirements for pulsing this pin to take readings.

Figure 4: Dust Sensor Module with connection cable.

Фигура 5: Прample connection of the Dust Sensor Module to an Arduino expansion shield.

Figure 6: Pinout diagram on the bottom of the module for reference.
6. Принципи на работа
The Sharp GP2Y1010AU0F sensor operates by detecting scattered light from dust particles. An infrared emitting diode (ILED) periodically pulses light into a detection area. If dust particles are present, they scatter this light, which is then detected by a phototransistor. The amount of scattered light is converted into an analog voltage output (AOUT).
Изходният обемtage is directly proportional to the concentration of dust in the air. Higher dust concentrations result in a higher analog output voltage. To obtain accurate readings, it is crucial to pulse the ILED pin according to the sensor's specifications (e.g., a 0.32ms pulse width within a 10ms cycle, with sampling at 0.28ms into the pulse).
7. Поддръжка
To ensure optimal performance and longevity of your dust sensor module, consider the following maintenance tips:
- Пази чистота: Periodically inspect the sensor's air intake and optical path for dust accumulation. Gently blow dust away using compressed air. Avoid using liquids or abrasive materials.
- Avoid Physical Contact: Do not touch the internal components of the sensor, especially the optical elements.
- No Adjustments: The potentiometer on the module is factory-calibrated. Do not attempt to adjust it, as this can negatively impact sensor accuracy.
8. Отстраняване на проблеми
If you encounter issues with your Waveshare Dust Sensor Detector Module, refer to the following common problems and solutions:
- No Output or Erratic Readings:
- Verify all connections (VCC, GND, AOUT, ILED) are secure and correctly wired to your MCU.
- Уверете се, че захранването обtage is within the specified range of 2.5V to 5.5V. Supplying higher voltages can damage the module.
- Check your microcontroller code for correct timing and analog reading procedures for the ILED and AOUT pins. Refer to Waveshare's official documentation for exampкода.
- Inconsistent or Fluctuating Readings:
- Ensure the sensor is placed in an area with stable airflow, free from direct drafts or stagnant air pockets. Consider adding a small fan to ensure consistent air sampling if needed.
- Environmental factors such as humidity and temperature can influence readings. Ensure the operating environment is within the specified temperature range.
- Module Not Powering On / Damaged:
- Reconfirm that the input voltage does not exceed 5.5V. Overvoltage is a common cause of damage.
- Inspect the module for any visible physical damage or loose solder joints.
9. Гаранция и поддръжка
For technical support, additional documentation, and software examples, please visit the official Waveshare website. Information regarding product warranty and return policies can typically be found on the product page where the item was purchased or on the Waveshare support portal.


