1. Въведение
Благодаря за покупкатаasing the Zenwire A10 Mini Portable Projector. This device is designed to provide a versatile and convenient projection experience, allowing you to display content from various sources, including smartphones, tablets, and computers. Please read this manual carefully before using the projector to ensure proper operation and to maximize its lifespan.
2. Важни инструкции за безопасност
- Не гледайте директно в обектива на проектора, когато lamp е включен.
- Осигурете добра вентилация около проектора, за да предотвратите прегряване. Не блокирайте вентилационните отвори.
- Използвайте само захранващия адаптер, доставен с проектора.
- Дръжте проектора далеч от вода, влага и запалими материали.
- Не се опитвайте сами да разглобявате или ремонтирате проектора. Свържете се с квалифициран сервизен персонал за помощ.
- Поставете проектора върху стабилна, равна повърхност.
- Изключвайте проектора от контакта по време на гръмотевични бури или когато не го използвате за продължителни периоди.
3. Съдържание на пакета
Моля, проверете съдържанието на опаковката след разопаковане. Ако някои от елементи липсват или са повредени, свържете се с вашия търговец на дребно.
- Zenwire A10 Mini Portable Projector
- Дистанционно управление
- Захранващ адаптер
- Ръководство за потребителя
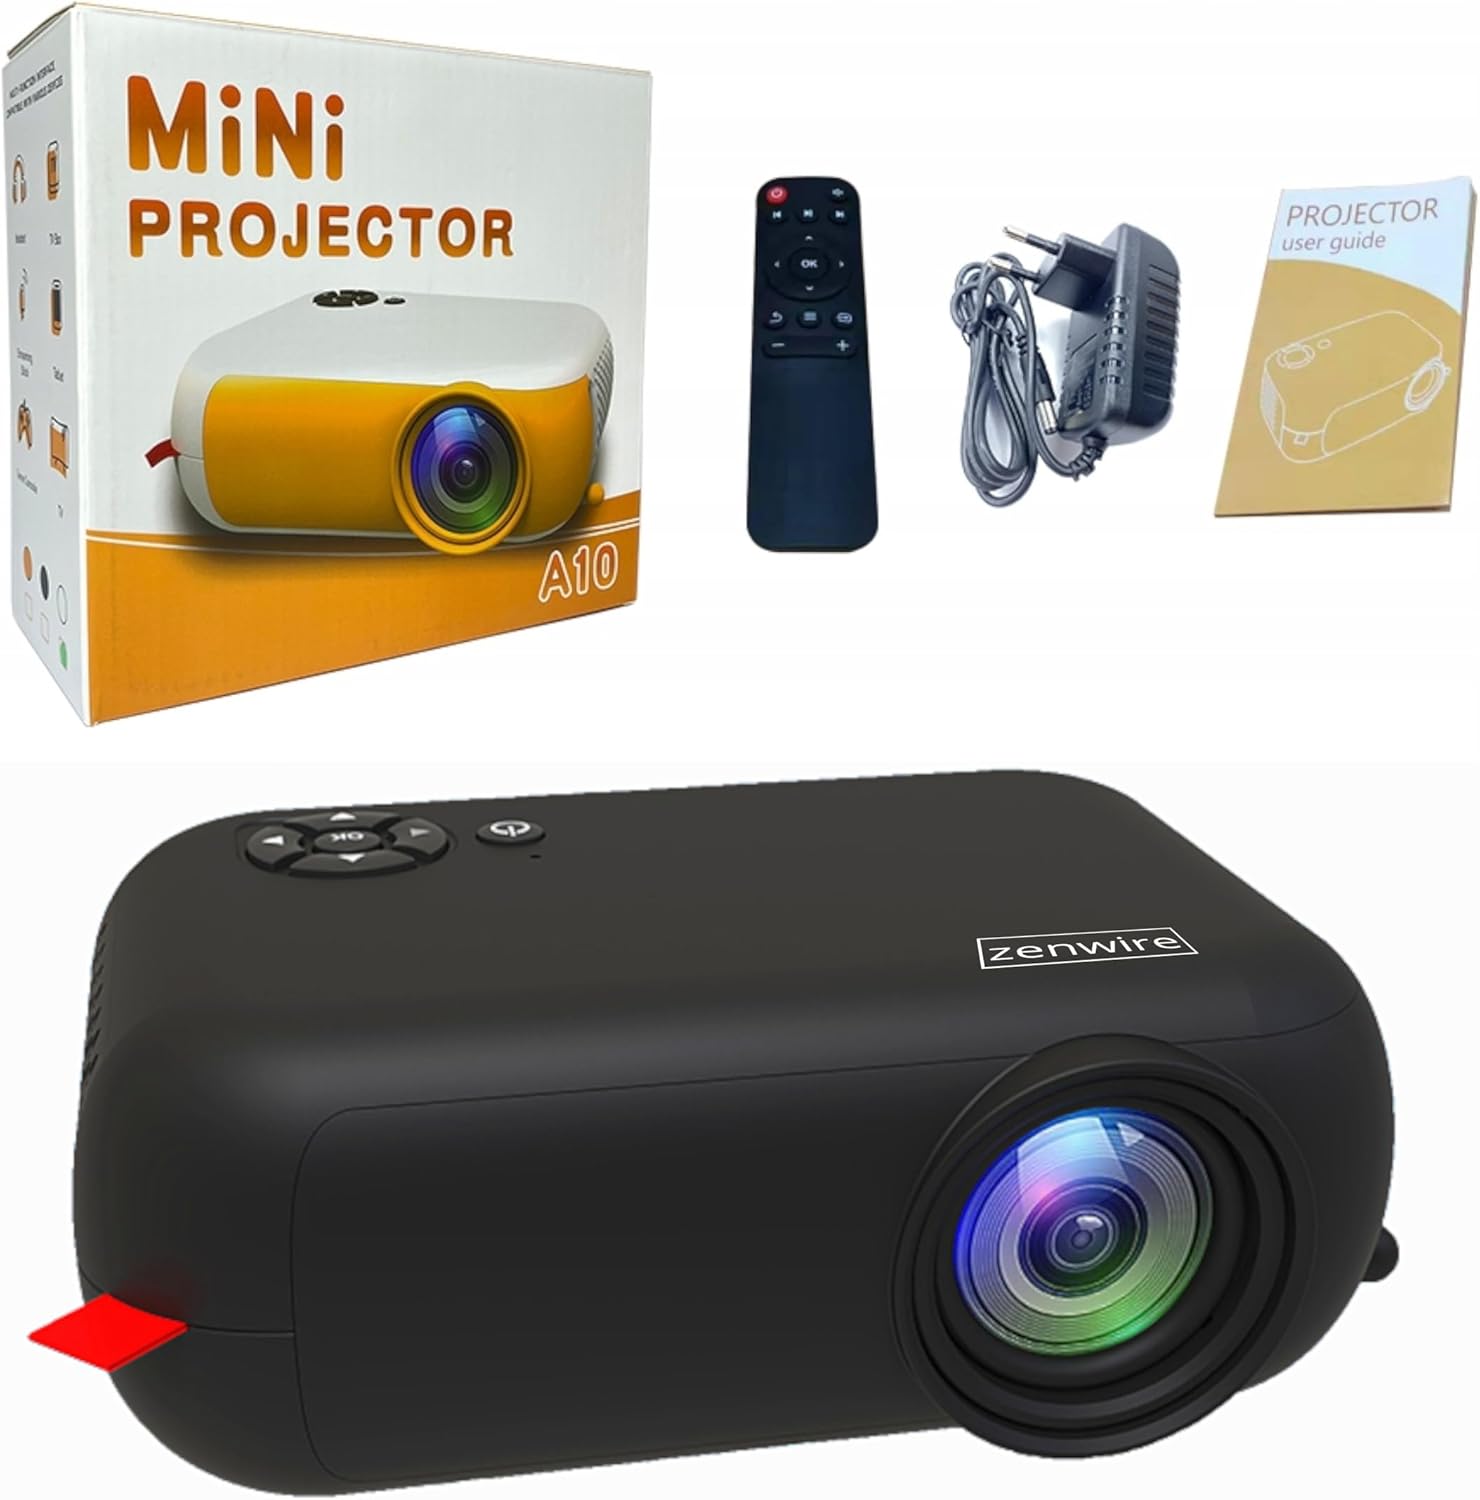
Image: Contents of the Zenwire A10 Mini Projector package, including the projector, remote control, power adapter, and user manual.
4. Продуктът свършиview
4.1 Projector Dimensions and Design
The Zenwire A10 is designed for portability, featuring a compact and lightweight form factor. Its dimensions are approximately 14cm x 10cm x 5.5cm, making it easy to carry and set up in various locations.

Image: The Zenwire A10 Mini Projector held in a hand, illustrating its compact size and portability.
4.2 Портове и контроли
The projector features a range of input and output ports for versatile connectivity, along with intuitive controls.

Image: Rear panel of the Zenwire A10 Mini Projector, showing the 5V-IN DC power input, IR receiver, USB port, 3.5mm audio jack, HDMI port, and SD card slot.
- 5V-IN DC: Входна мощност за проектора.
- IR: Инфрачервен приемник за дистанционно управление.
- USB: Свържете USB устройства за съхранение за възпроизвеждане на мултимедия.
- Жак за слушалки (3.5 мм): Свържете външни високоговорители или слушалки.
- HDMI: Connect devices such as laptops, gaming consoles, or streaming sticks.
- SD: Insert Micro SD cards for media playback.
- Фокусно колело: Adjust image sharpness (located on the side).
- Контролен панел: Buttons on top for navigation and selection.
5. Настройка
5.1 Захранване
- Свържете предоставения захранващ адаптер към 5V-IN DC порт на проектора.
- Включете захранващия адаптер в стенен контакт.
- Натиснете бутона за захранване на проектора или дистанционното управление, за да го включите.
5.2 Placement and Focus Adjustment
- Place the projector on a stable surface or mount it according to your preference. Ensure the projector lens is facing the projection surface (wall or screen).
- Adjust the distance between the projector and the screen to achieve your desired image size. The projector supports screen sizes up to 100 inches.
- Rotate the focus wheel (typically located near the lens) until the projected image appears clear and sharp.

Image: Diagram illustrating the Zenwire A10 Mini Projector's capability to project various screen sizes, from 13 inches up to 100 inches, depending on the projection distance.
6. Работа с проектора
6.1 Wireless Connection (Miracast & Airplay)
The Zenwire A10 supports wireless screen mirroring via 2.4/5GHz WiFi, compatible with Android (Miracast) and iOS (Airplay) devices.
- Уверете се, че вашият проектор и мобилно устройство са свързани към една и съща Wi-Fi мрежа.
- On the projector's main menu, select the 'Screen Mirroring' or 'Wireless Display' option.
- За Android: On your Android phone/tablet, enable 'Wireless Display', 'Screen Mirroring', 'Smart View', or similar function (names may vary by device). Select the projector from the list of available devices.
- За iOS: On your iPhone/iPad, open Control Center and tap 'Screen Mirroring'. Select the projector from the list of available devices.
- The content from your mobile device should now be mirrored on the projector screen.
6.2 Кабелни връзки
The projector offers multiple wired input options for various devices.

Image: The Zenwire A10 Mini Projector connected to various devices such as smartphones, tablets, laptops, desktop computers, gaming consoles, and media players, highlighting its versatile connectivity.
- HDMI: Connect a laptop, PC, gaming console (e.g., Xbox, PlayStation), or streaming device (e.g., Amazon Fire TV Stick, Google Chromecast) using an HDMI cable. Select the HDMI input source on the projector.
- USB: Insert a USB flash drive or external hard drive into the USB port. The projector's media player will allow you to browse and play supported video, audio, and image files.
- Micro SD: Insert a Micro SD card into the SD card slot. Similar to USB, you can access media files through the projector's interface.
- Audio Out (3.5mm Jack): Connect external speakers or headphones to enhance the audio experience.
6.3 Навигация в менюто
Use the remote control or the buttons on the projector to navigate through the on-screen menu. Select input sources, adjust picture settings (brightness, contrast, color), sound settings, and other system preferences.
7. Поддръжка
- Почистване на лещите: Използвайте мека кърпа без власинки, специално предназначена за оптични лещи, за да избършете внимателно лещата на проектора. Избягвайте използването на абразивни почистващи препарати или прекомерна сила.
- Отстраняване на прах: Regularly clean the projector's exterior with a soft, dry cloth. Use a small brush or compressed air to clear dust from the ventilation openings to ensure proper airflow.
- Съхранение: Когато не се използва, съхранявайте проектора на хладно и сухо място, далеч от пряка слънчева светлина и екстремни температури. Използвайте оригиналната опаковка или защитен калъф, за да предотвратите натрупване на прах и повреда.
8. Отстраняване на проблеми
If you encounter issues with your Zenwire A10 projector, refer to the following common problems and solutions:
| проблем | Възможна причина | Решение |
|---|---|---|
| Няма изображение на екрана | Захранването не е свързано; Неправилен входен източник; Устройството не е свързано правилно. | Check power cable; Select correct input source (HDMI, USB, etc.); Reconnect source device. |
| Изображението е замъглено | Фокусът не е регулиран; Проекторът е твърде близо/далеч от екрана. | Adjust the focus wheel; Adjust projection distance. |
| Без звук | Силата на звука е твърде ниска; Звукът е изключен; Външно аудио устройство не е свързано/избрано. | Increase volume; Unmute; Check external speaker connection or select internal speaker. |
| Проблеми с безжичната връзка | Not on same Wi-Fi network; Device not compatible; Interference. | Ensure both devices are on the same Wi-Fi; Verify device compatibility; Try moving closer to Wi-Fi router. |
9. Спецификации
| Характеристика | детайл |
|---|---|
| Марка | Zenwire |
| Номер на модела | A10 |
| Тип продукт | Compact and Portable Projector |
| Естествена разделителна способност | 480 x 360p |
| Максимална резолюция на дисплея | 1920 x 1080 (Full HD) |
| Яркост | 1800lm / 60 ANSI |
| Контрастно съотношение | 2000:1 |
| Тип дисплей | LED |
| Технология за свързване | Wi-Fi (2.4/5GHz), HDMI, USB, Micro SD, 3.5mm Audio Jack |
| Безжични функции | Miracast, Airplay |
| Съвместими устройства | Smartphones (Android, iOS), Tablets, Laptops, PCs, Gaming Consoles |
| Препоръчителни употреби | Домашно кино |
| Размери (прибл.) | 14 см x 10 см x 5.5 см |
10. Гаранция и поддръжка
The Zenwire A10 Mini Portable Projector comes with a standard manufacturer's warranty. For specific warranty terms and conditions, please refer to the documentation provided at the time of purchase or contact your retailer. For technical support or service inquiries, please reach out to Zenwire customer service through their official webсайта или информацията за контакт, предоставена с вашия продукт.


