Ръководство за потребителя на мини проектор BlitzWolf BW-VT2
Your comprehensive guide to setting up, operating, and maintaining your BlitzWolf BW-VT2 Mini Projector.
1. Продуктът свършиview
1.1 Съдържание на опаковката
Моля, проверете дали всички артикули са налични във вашия пакет:
- BlitzWolf BW-VT2 Mini Projector
- Дистанционно управление
- Захранващ адаптер
- HDMI кабел
- Ръководство на потребителя (този документ)
1.2 Оформление на устройството
Familiarize yourself with the various parts and ports of your projector.
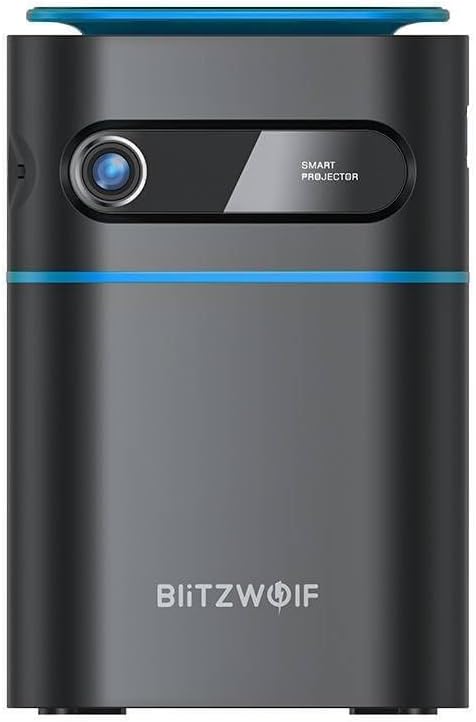
Фигура 1.1: Отпред View. This image displays the front of the BlitzWolf BW-VT2 Mini Projector, highlighting the projection lens and the 'SMART PROJECTOR' branding.

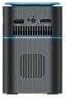
Figure 1.2: Projector with Remote Control. This image shows the BlitzWolf BW-VT2 Mini Projector alongside its dedicated remote control, illustrating the compact size of both devices.
Фигура 1.3: Задна част View. The rear of the projector is shown, featuring ventilation grilles and various input/output ports.

Фигура 1.4: Страна View. This image highlights the side of the projector where additional connectivity options such as USB and HDMI ports are located.

Фигура 1.5: Отгоре View. The top surface of the projector is visible, featuring the integrated touch control panel for direct interaction.
1.3 Портове и контроли
- HDMI порт: Connect to laptops, game consoles, Blu-ray players, etc.
- USB порт: Свържете USB флаш устройства за възпроизвеждане на мултимедия.
- Audio Out (3.5mm) Port: Свържете външни високоговорители или слушалки.
- DC IN порт: Свържете захранващия адаптер.
- Бутон за захранване: Включва/изключва проектора.
- Фокусно колело: Регулира яснотата на изображението.
- Сензорен контролен панел: Navigate menus and control playback directly on the device.
2. Ръководство за настройка
2.1 Включване
- Свържете захранващия адаптер към DC IN порта на проектора.
- Включете захранващия адаптер в стенен контакт.
- Press and hold the Power Button on the projector or the remote control until the device powers on.
2.2 Първоначално настаняване
За оптимално viewing experience, consider the following:
- Поставете проектора върху стабилна, равна повърхност.
- Ensure there is adequate ventilation around the projector to prevent overheating.
- Position the projector perpendicular to the projection surface (wall or screen) for a rectangular image.
- Adjust the distance to achieve your desired screen size.
2.3 Настройка на фокуса
After powering on, adjust the focus to ensure a clear image:
- Завъртете колелцето за фокусиране, разположено близо до обектива, докато проектираното изображение стане рязко и ясно.
2.4 Настройка на дистанционното управление
Insert batteries into the remote control before first use:
- Отворете капака на отделението за батерии на гърба на дистанционното управление.
- Поставете две батерии AAA (не са включени), като внимавате за правилната полярност (+/-).
- Затворете капака на отделението за батерията.
3. Инструкции за работа
3.1 Навигация
You can navigate the projector's interface using either the remote control or the touch control panel on top of the device.
- Дистанционно управление: Use the directional buttons (up, down, left, right) to move through menus and the 'OK' button to select.
- Сензорен контролен панел: Swipe and tap on the touch-sensitive surface to navigate.
3.2 Свързване на устройства
The BW-VT2 supports various input sources:
- HDMI вход: Connect your laptop, game console, or other HDMI-enabled devices using an HDMI cable. Select the HDMI input source from the projector's menu.
- USB вход: Insert a USB flash drive into the USB port. The projector's media player will typically detect the drive automatically, allowing you to browse and play supported media files (videos, photos, music).
- Wi-Fi свързаност: Navigate to the 'Settings' menu, then 'Network' or 'Wi-Fi'. Select your Wi-Fi network and enter the password to connect the projector to the internet. This enables access to online streaming apps and updates.
3.3 Функции на операционната система Android
As an Android-powered projector, the BW-VT2 offers smart functionalities:
- Достъп до приложението: Download and install various streaming apps (e.g., Netflix, YouTube) directly from the pre-installed app store or by sideloading APKs.
- настройки: Customize display settings, audio output, network configurations, and system preferences through the Android settings menu.
- Дублиране на екрана: Utilize built-in screen mirroring features (e.g., Miracast, AirPlay compatible apps) to project content from your smartphone or tablet wirelessly.
3.4 Аудио изход
The projector has built-in speakers, but you can also connect external audio devices:
- 3.5 мм аудио изход: Connect headphones or external speakers via the 3.5mm audio jack for enhanced sound.
4. Поддръжка
Правилната поддръжка гарантира дълготрайността и оптималната работа на вашия проектор.
4.1 Почистване на лещите
To maintain clear image quality, clean the projector lens regularly:
- Използвайте мека кърпа без власинки, специално предназначена за оптични лещи.
- Внимателно избършете лещата с кръгови движения.
- Avoid using abrasive cleaners or excessive force, which can scratch the lens.
4.2 Вентилация
Ensure proper airflow to prevent overheating:
- Do not block the ventilation vents on the projector.
- Работете с проектора в добре проветриво помещение.
- Periodically clean dust from the vents using a soft brush or compressed air.
4.3 Съхранение
When not in use, store your projector properly:
- Store the projector in a cool, dry place, away from direct sunlight and extreme temperatures.
- Use the original packaging or a protective case to prevent dust accumulation and physical damage.
5. Отстраняване на проблеми
Вижте този раздел за често срещани проблеми и техните решения.
| проблем | Възможна причина | Решение |
|---|---|---|
| Проекторът не се включва. | Няма захранваща връзка; дефектен захранващ адаптер. | Ensure power adapter is securely connected to both projector and outlet. Try a different outlet. |
| Не се прожектира изображение. | Incorrect input source selected; loose HDMI/USB cable. | Verify the correct input source is selected in the menu. Check cable connections. |
| Изображението е размазано. | Focus not adjusted; projector too close/far. | Rotate the focus wheel until the image is clear. Adjust projection distance if necessary. |
| Без звук. | Volume too low; external audio device not connected properly. | Increase volume. Check connections to external speakers/headphones. Ensure audio output is set correctly in settings. |
| Проблеми с Wi-Fi връзката. | Неправилна парола; проблеми с рутера; смущения в сигнала. | Re-enter Wi-Fi password. Restart router. Move projector closer to router. |
| Дистанционното управление не работи. | Изтощени батерии; препятствие; дистанционното не е сдвоено. | Replace batteries. Ensure no obstruction between remote and projector. |
6. Технически спецификации
Key specifications of the BlitzWolf BW-VT2 Mini Projector:
| Характеристика | Спецификация |
|---|---|
| Марка | BlitzWolf |
| Номер на модела | BW-VT2EU |
| Цвят | черен |
| Технология за свързване | HDMI, USB, VGA, Wi-Fi |
| Резолюция на дисплея | 1920 x 1080 (Full HD) |
| Тип дисплей | LCD, LED |
| Форма фактор | Преносим |
| Специални функции | Portable, Android OS, Wi-Fi, HDMI, USB, VGA |
| Съвместими устройства | Laptops, Smartphones, Game Consoles, Blu-ray Players, Media Players, Wi-Fi enabled devices |
| Препоръчителни употреби | Домашно кино |
7. Гаранция и поддръжка
7.1 Гаранция на производителя
The BlitzWolf BW-VT2 Mini Projector comes with a 2-годишна гаранция от производителяТази гаранция покрива дефекти в материалите и изработката при нормална употреба. Моля, запазете доказателството си за покупка за предявяване на гаранционни претенции.
7.2 Поддръжка на клиенти
If you encounter issues not covered in the troubleshooting section or require further assistance, please contact BlitzWolf customer support. Refer to the product packaging or the official BlitzWolf webсайт за най-актуална информация за контакт.


