1. Въведение
The 8BitDo 64 Bluetooth Controller is designed for enhanced gaming experiences across multiple platforms. This manual provides essential information for setting up, operating, and maintaining your controller.
Съвместимост: Analogue 3D, Switch, Switch 2, Windows, Android.
Свързване: Bluetooth or Wired USB.
2. Съдържание на пакета
- 8BitDo 64 Bluetooth контролер
- USB-C кабел
- Ръководство за употреба (този документ)
3. Контролер надview

Фигура 1: Отпред View. This image displays the front of the 8BitDo 64 Bluetooth Controller, highlighting the classic button layout including the D-pad, analog stick, A, B, X, Y buttons, and central function buttons like Start and Select.

Фигура 2: Гръб View. This image shows the rear of the controller, featuring the S/D mode switch for different input modes and the product information label.

Фигура 3: Отгоре View. This image illustrates the top edge of the controller, detailing the L/R shoulder buttons, Z-triggers, and the USB-C charging/connection port.

Figure 4: Hall Effect Joystick. Подробен view of the controller's Hall Effect Joystick, known for its precision and durability.
4. Настройка
4.1 Зареждане на контролера
Connect the supplied USB-C cable to the controller's USB-C port and the other end to a USB power source (e.g., computer, USB wall adapter). The LED indicators will show charging status and turn off when fully charged.
4.2 Firmware Update (Critical)
It is highly recommended to update your controller's firmware before first use, especially for compatibility with Analogue 3D and Switch 2. Firmware updates often include critical bug fixes and performance improvements.
- Visit the official 8BitDo support webсайт.
- Download the latest firmware update tool for your operating system (Windows/macOS).
- Connect your 8BitDo 64 Bluetooth Controller to your computer using the USB-C cable.
- Follow the on-screen instructions in the update tool to complete the firmware update.
4.3 Свързване чрез Bluetooth
Ensure the controller is charged and updated before attempting Bluetooth connection.
4.3.1 Mode Selection (S/D Switch)
The switch on the back of the controller allows you to select between 'S' (Switch/Analogue 3D) and 'D' (Windows/Android) input modes. Ensure the correct mode is selected for your device.
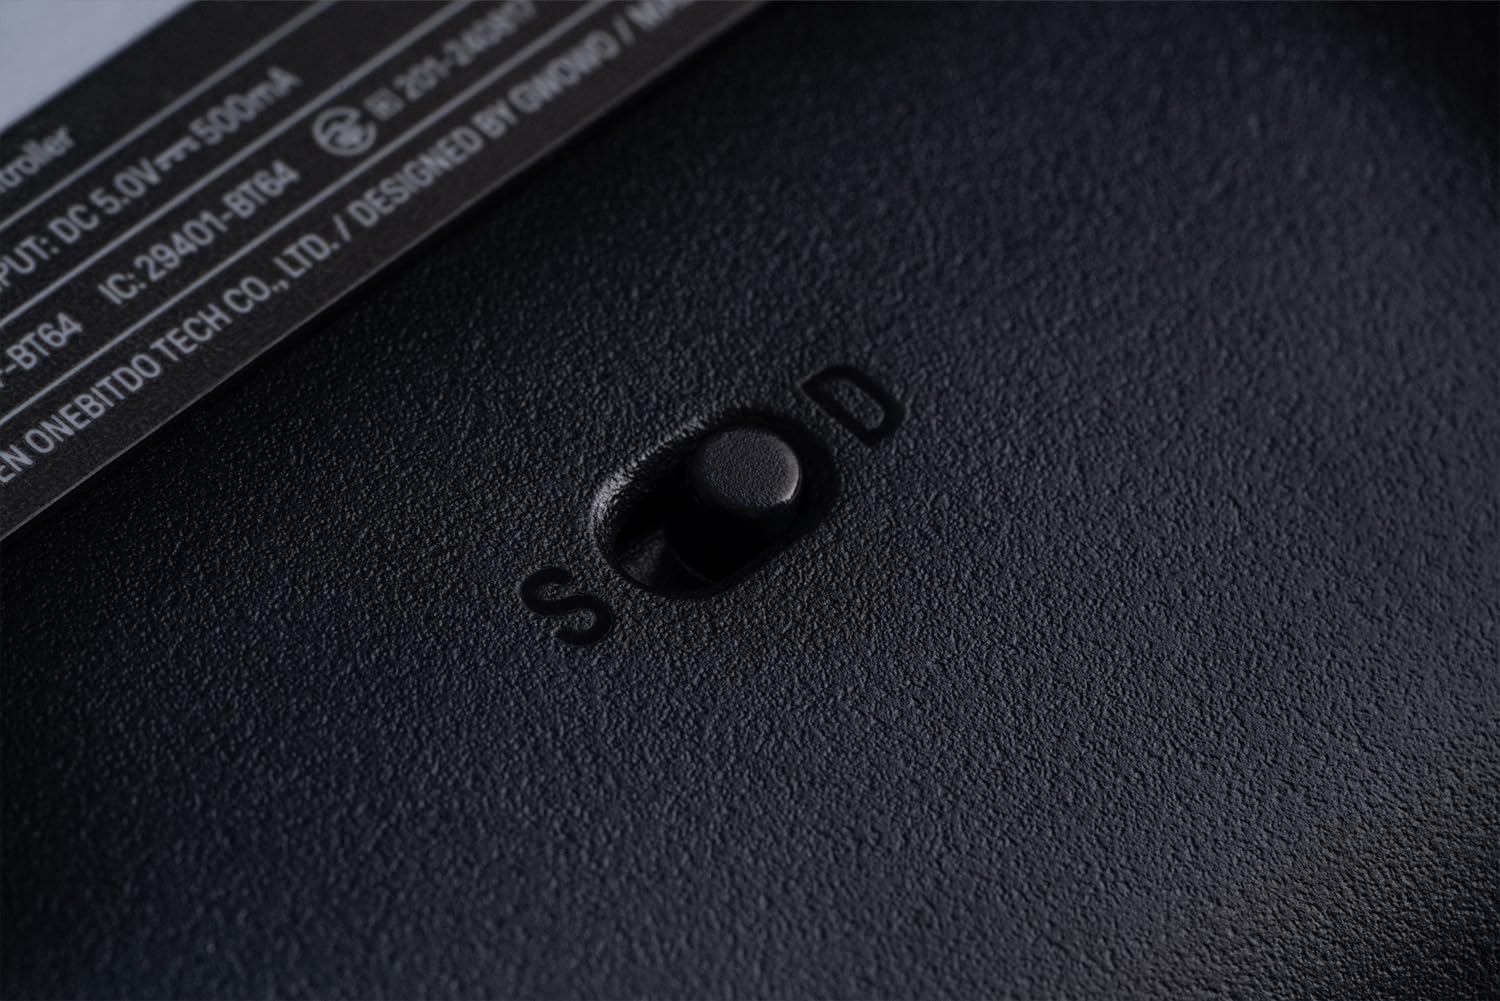
Figure 5: S/D Mode Switch. This image highlights the physical switch on the controller's rear for selecting input modes.
4.3.2 Pairing with Analogue 3D / Switch / Switch 2
- Set the mode switch on the back of the controller to 'S'.
- Press and hold the Start button on the controller for 3 seconds until the LED indicators begin to flash rapidly.
- On your Analogue 3D or Switch console, navigate to the controller pairing menu.
- Select the 8BitDo 64 Bluetooth Controller from the list of available devices.
- LED индикаторите на контролера ще светят постоянно, когато сдвояването е успешно.
4.3.3 Pairing with Windows / Android
- Set the mode switch on the back of the controller to 'D'.
- Press and hold the Start button on the controller for 3 seconds until the LED indicators begin to flash rapidly.
- On your Windows PC or Android device, enable Bluetooth and search for new devices.
- Select the 8BitDo 64 Bluetooth Controller from the list of available devices.
- LED индикаторите на контролера ще светят постоянно, когато сдвояването е успешно.
4.4 Connecting via Wired USB
For a wired connection, simply connect the 8BitDo 64 Bluetooth Controller to your device (PC, Switch dock, Analogue 3D) using the supplied USB-C cable. The controller will automatically switch to wired mode.
5. Инструкции за работа
5.1 Разположение и функции на бутоните
The 8BitDo 64 Bluetooth Controller features a layout inspired by classic N64 controllers, adapted for modern gaming.
- Аналогов стик: Първичен контрол на движението.
- D-Pad: Насочен вход.
- A/B Buttons: Main action buttons.
- C-Buttons (Triangle, Circle, Square, Cross): Context-sensitive actions, often camera control or specific game functions.
- Бутон за стартиране: Пауза, достъп до менюто.
- Копчета за рамо (ляво/дясно): Допълнителни бутони за действие.
- Z-Triggers (L/R): Located on the underside of the shoulder buttons, providing quick access for specific actions like aiming or shielding.
5.2 Турбо функция
The Turbo function allows a button to be pressed repeatedly as long as it is held down. To activate/deactivate:
- Press and hold the button you wish to assign Turbo to.
- While holding the button, press the Star button (Turbo button). The LED will flash to confirm activation.
- To deactivate, repeat the process.
5.3 Функция за вибрация
Vibration is supported on Analogue 3D and Switch (Nintendo 64 Online only). The intensity of vibration is game-dependent and cannot be manually adjusted on the controller.
6. Поддръжка
- Дръжте контролера сух и далеч от екстремни температури.
- Почиствайте контролера с мека, суха кърпа. Не използвайте агресивни химикали или абразивни материали.
- Избягвайте изпускане или подлагане на контролера на силни удари.
- Съхранявайте контролера на безопасно място, когато не го използвате, за да предотвратите повреда.
7. Отстраняване на проблеми
- Контролерът не се свързва: Ensure the mode switch (S/D) is set correctly for your device. Try re-pairing the controller. Ensure the controller is charged.
- Бутоните не реагират: Check for any physical obstructions. Ensure the controller's firmware is up to date.
- Закъснение при въвеждане: Ensure you are within the optimal range for Bluetooth connectivity. Try a wired connection to rule out wireless interference.
- Проблеми с актуализацията на фърмуера: Ensure you are using the correct update tool for your operating system and controller model. Try a different USB port or cable.
8. Спецификации
| Номер на модела | 6922621507161 |
| Свързаност | Bluetooth 5.0 (Support Bluetooth LE), Wired USB |
| Вход | DC 5V === 500mA |
| Батерия | 1 литиево-йонна батерия (включена) |
| Размери | 15.94 x 8.07 x 12.4 инча |
| Тегло | 7.05 унции |
9. Гаранция и поддръжка
For warranty information, technical support, or further assistance, please visit the official 8BitDo webсайта или се свържете директно с отдела за обслужване на клиенти. Запазете доказателството си за покупка за гаранционни рекламации.


