Въведение
The FEELWORLD FW759PRO is a 7-inch full HD IPS touchscreen camera monitor designed to enhance your video production workflow. It features a 1280x800 resolution, 1000:1 contrast ratio, and a 178° ultra-wide viewing angle, providing a clear and detailed display for precise monitoring. This manual will guide you through the setup, operation, and maintenance of your FW759PRO monitor.
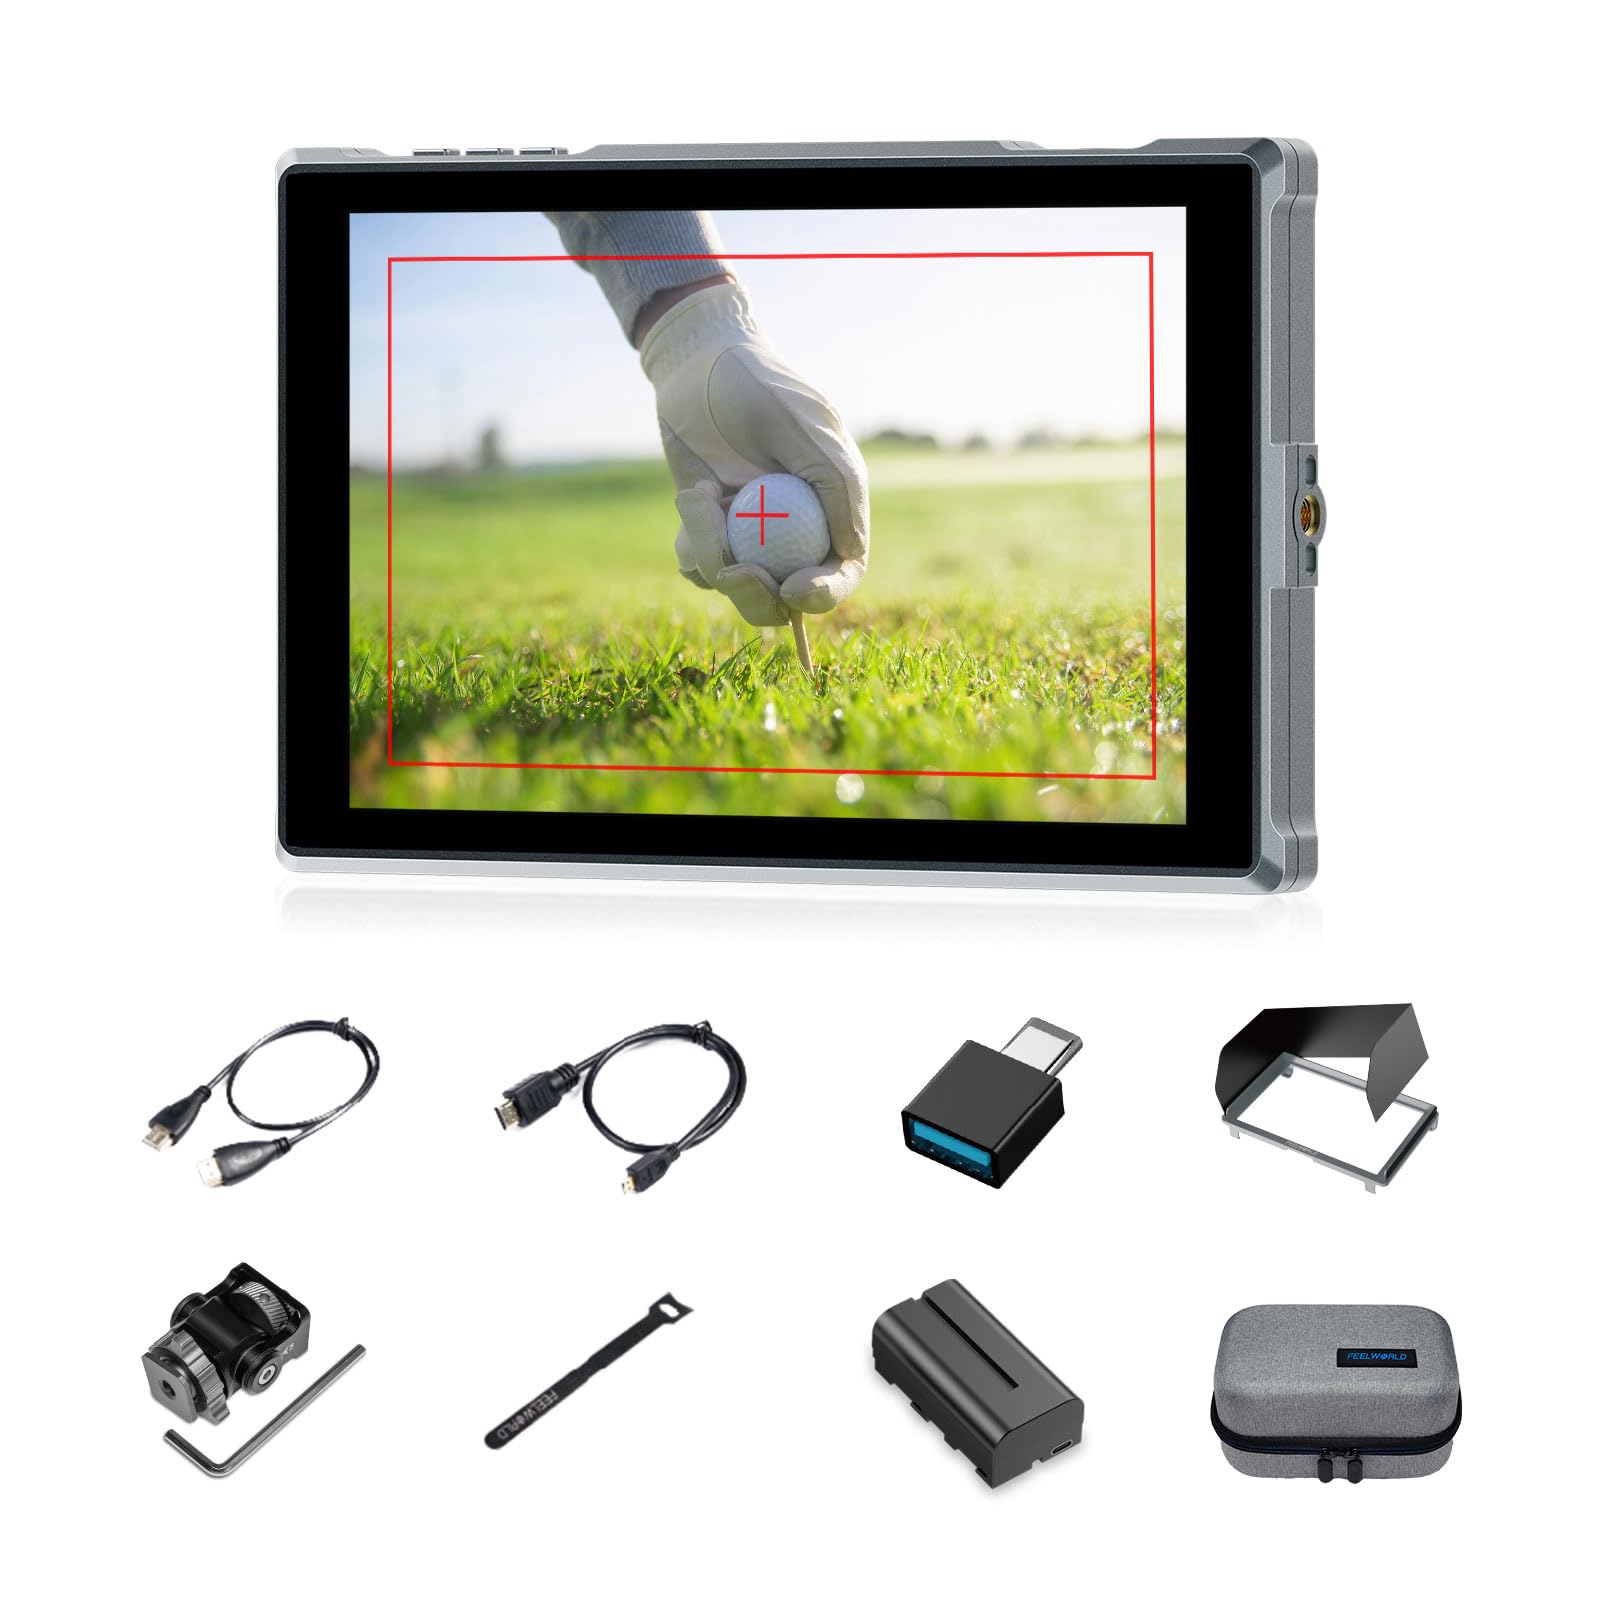
Figure 1: FEELWORLD FW759PRO Monitor Overview
Ключови характеристики:
- 7-inch Full HD IPS Touchscreen (1280x800 resolution)
- 4K HDMI Input & Output (up to 4K30Hz) and AV Input
- Slim and Lightweight Design (22mm thickness, 300g weight)
- Multiple Power Options: NP-F series battery, 12V DC IN, 5V Type-C
- Advanced Monitoring Functions: Histogram, Embedded Audio, False Colors, Peaking Filter, etc.
- Customizable Features: 4 groups of menu settings, 9:16 vertical screen marker
Настройка
1. Съдържание на пакета
Проверете дали всички елементи са налични в пакета:
- 1 x FW759PRO Monitor
- 1 x HDMI кабел
- 1 x Micro HDMI Cable
- 1 x Mini Hot Shoe Mount + Hex Wrench
- 1 x USB-A към USB-C адаптер
- 1 x Sun Shade + Frame
- 1 x Cable Management Tie
- 1 x Ръководство за бърз старт
- 1 x F550 Battery
- 1 х чанта

Фигура 2: Включени аксесоари
2. Включване на монитора
The FW759PRO offers three power options:
- Батерия серия NP-F: Attach a compatible NP-F series battery to the battery plate on the rear of the monitor.
- 12V DC IN: Connect a 12V DC power adapter (not included, suitable for 1A, DC 5.5*2.1mm plug) to the "DC IN 12V" port.
- 5V Type-C: Connect a 5V/2A (or higher) Type-C power source to the "TYPE-C 5V" port.

Figure 3: Power Input Options
3. Монтиране на монитора
The monitor features two 1/4"-20 mounting ports on its sides for versatile attachment to camera rigs, arms, or tripods. Use the included mini hot shoe mount to attach it to your camera's hot shoe or cold shoe mount.

Figure 4: 1/4 Inch Mounting Ports
4. Connecting to a Camera/Device
The FW759PRO supports 4K HDMI and AV inputs:
- HDMI вход: Connect your camera or video source using an HDMI cable to the HDMI port. The monitor supports up to 4K30Hz signals.
- AV вход: For specialized or legacy devices, use the AV input port.

Фигура 5: Портове за свързване
Инструкция за работа
1. Включване/изключване
Press and hold the power button located on the top edge of the monitor to turn it on or off.
2. Работа със сензорен екран
The FW759PRO features an intuitive touchscreen interface for menu navigation and function control.
- Регулиране на фоновото осветление: Swipe up/down on the left half of the screen.
- Регулиране на звука: Swipe up/down on the right half of the screen.
- Access Shortcut Menu: Swipe up/down on the bottom of the screen.

Figure 6: Touchscreen Gestures
3. Menu Navigation and Custom Buttons
Access the main menu by tapping the screen. Navigate through options using touch. The monitor also features customizable function buttons (F1, F2, F3) on the top edge, allowing quick access to frequently used features.

Figure 7: Menu and Custom Buttons
4. Разширени функции за мониторинг
The FW759PRO includes several tools for precise exposure and focus control:
- Хистограма: Показва тоналното разпределение на вашето изображение.
- Пиков филтър: Highlights sharp edges to assist with focus.
- Вградено аудио: Следи нивата на звука.
- Фалшиви цветове: Helps set exposure by displaying different exposure levels as distinct colors.
- Поле за отметка: Assists in calibrating the monitor.
- Девет решетки: Aids in composition.
- Screen Marker: Various aspect ratio markers for framing.
- Централен маркер: Marks the center of the screen.
- Ratio Marker: Provides different aspect ratio guides.
- Надсканиране: Adjusts the display area.
- Анаморфен режим: Разтваря анаморфното фуtage (1.33x, 1.6x, 2.0x, or custom).
- Обратно изображение: Обръща изображението хоризонтално или вертикално.
- Замразяване на изображението: Freezes the current frame.
- Увеличавам: Увеличава част от изображението за подробен преглед.
- Пиксел по пиксел: Показва изображението с неговата оригинална резолюция без мащабиране.

Figure 8: Auxiliary Functions Overview

Figure 9: False Color Function

Figure 10: Anamorphic Mode
5. New Feature Upgrades
- 9:16 Vertical Screen Marker: Ideal for content creators producing vertical video for platforms like TikTok and YouTube Shorts.
- 4 Groups Menu Setting Saving: Save up to four custom menu configurations for quick recall. Once settings are adjusted, they save automatically and can be called directly.

Figure 11: 9:16 Vertical Screen Marker
Поддръжка
1. Почистване на монитора
- Use a soft, lint-free cloth to gently wipe the screen and body of the monitor.
- За упорити замърсявания, леко разбъркайтеampИзбършете кърпата с вода или почистващ разтвор, безопасен за екрани.
- Avoid using harsh chemicals, solvents, or abrasive materials, as these can damage the screen or finish.
2. Грижа за батерията
- Съхранявайте батериите на хладно и сухо място, когато не ги използвате.
- Avoid fully discharging lithium-ion batteries frequently to prolong their lifespan.
- Ако съхранявате батериите за продължителни периоди, заредете ги до приблизително 50-60% от капацитета им.
Отстраняване на неизправности
No Signal Displayed
- Проверете кабелните връзки: Ensure HDMI or AV cables are securely connected to both the monitor and the camera/source.
- Проверете входния източник: Confirm that the correct input source (HDMI or AV) is selected on the monitor.
- Camera Output Settings: Check your camera's video output settings to ensure it is sending a signal and that the resolution/frame rate is compatible with the monitor (up to 4K30Hz).
- Тествайте с друг кабел/устройство: If possible, try a different HDMI/AV cable or connect the monitor to another video source to isolate the issue.
Monitor Does Not Power On
- Проверка на батерията: Ensure the NP-F battery is charged and correctly installed.
- Проверете захранващия адаптер: If using DC IN or Type-C, confirm the power adapter is connected and providing sufficient power (12V DC IN, 5V/2A Type-C).
- Бутон за захранване: Ensure the power button is pressed and held for a few seconds to initiate power-on.
Сензорният екран не реагира
- Restart Monitor: Power off and then power on the monitor.
- Чист екран: Уверете се, че екранът е чист и без замърсявания или влага, които биха могли да попречат на сензорното въвеждане.
Спецификации
| Характеристика | детайл |
|---|---|
| Марка | FEELWORLD |
| Име на модела | FW759PRO |
| Размер на екрана | 7 инча |
| Резолюция | 1280x800 |
| Съотношение на страните | 16:10 |
| Контрастно съотношение | 1000:1 |
| Тип дисплей | IPS |
| Viewъгъл на ъгъл | 178 градуса |
| Технология за свързване | Допълнителен, HDMI |
| Свързване с хардуер | HDMI |
| Допълнителни функции | Touchscreen, Portable |
| Време за реакция | 2 милисекунди |
| Total Number of HDMI Ports | 2 |
| производител | ЛАЙЗЕСКЕ |
Гаранция и поддръжка
Гаранционна информация
The FEELWORLD FW759PRO monitor comes with a 1 години гаранция от датата на покупка. Тази гаранция покрива производствени дефекти и неизправности при нормална употреба. Моля, запазете доказателството си за покупка за гаранционни рекламации.
For detailed warranty terms and conditions, please refer to the official FEELWORLD webсайт или се свържете с тяхната поддръжка на клиенти.
Поддръжка на клиенти
If you encounter any issues not covered in this manual or require further assistance, please contact FEELWORLD customer support. Contact information can typically be found on the official FEELWORLD webсайта или в Ръководството за бърз старт, включено в продукта.


